How to Create a Fashion Influencer Lightroom Preset (Easy Tutorial)
Ever wondered how fashion influencers get that creamy, tanned, slightly moody look in their Instagram photos? The secret is a custom Lightroom preset—and it’s easier than you think. In this tutorial, I’ll show you exactly how I edit my photos in under 10 minutes using only Adobe Lightroom Mobile. No paid filters, no complicated tools—just a few minutes of your time and my easy to follow Lightroom presets tutorial.

What is a Lightroom Preset?
A Lightroom preset is a photo preset, just like the filters you see on Instagram but these are for Adobe Lightroom. Using a Lightroom preset isn’t about over-editing your photos though. Influencers, brands and content creators use presets to keep their photos and Instagram feeds coherent. This helps to make their brand and content consistent, as well as easily recognizable. Although apps like Instagram have a range of fun photo filters and effects, Instagram is not a professional photo editing software and these IG filters tend to look false and unnatural because they’re created for entertainment over anything else.
Is Adobe Lightroom Mobile Easy to Use?
If jumping from simple Instagram filters to using Adobe Lightroom presets seems too overwhelming then don’t worry! Yes, Adobe software is often used by professional photographers, graphic designers and videographers, but it’s not as difficult to use as you may think. Once you’ve got the hang of it, it’s really simple to use. My top tip when getting started though, would be to decide what you want to use it for and focus on learning that task. A big mistake that many people make when using Lightroom and Photoshop is that they open the app and see lots of tools without understanding what any of them do. For the purpose of this Lightroom presets tutorial, we are focusing only on creating and using photo presets for editing your photos in Lightroom Mobile.

Why Do Content Creators Use Photo Presets?
Gone are the days when Instagram content creators would use a different filter for every image. Now, despite Instagram feeds becoming more raw and less curated, it’s still important that your brand’s visuals are consistent. Although some content creators and influencers use the same preset or preset collection for all of their images, you don’t have to use the same preset for everything. However, using photo presets are a great way to organize your content into themes, series and collections. If you’re a content creator, you might choose to assign different presets to different seasons, blog topics or sponsored brand collaborations. If you’re a brand owner, you might use different photo presets for different campaigns you’re working on to promote your products or services. For e.g. the preset you might use for your summer coastal campaign may differ to the one you use for autumnal campaign because the two have very different aesthetics.

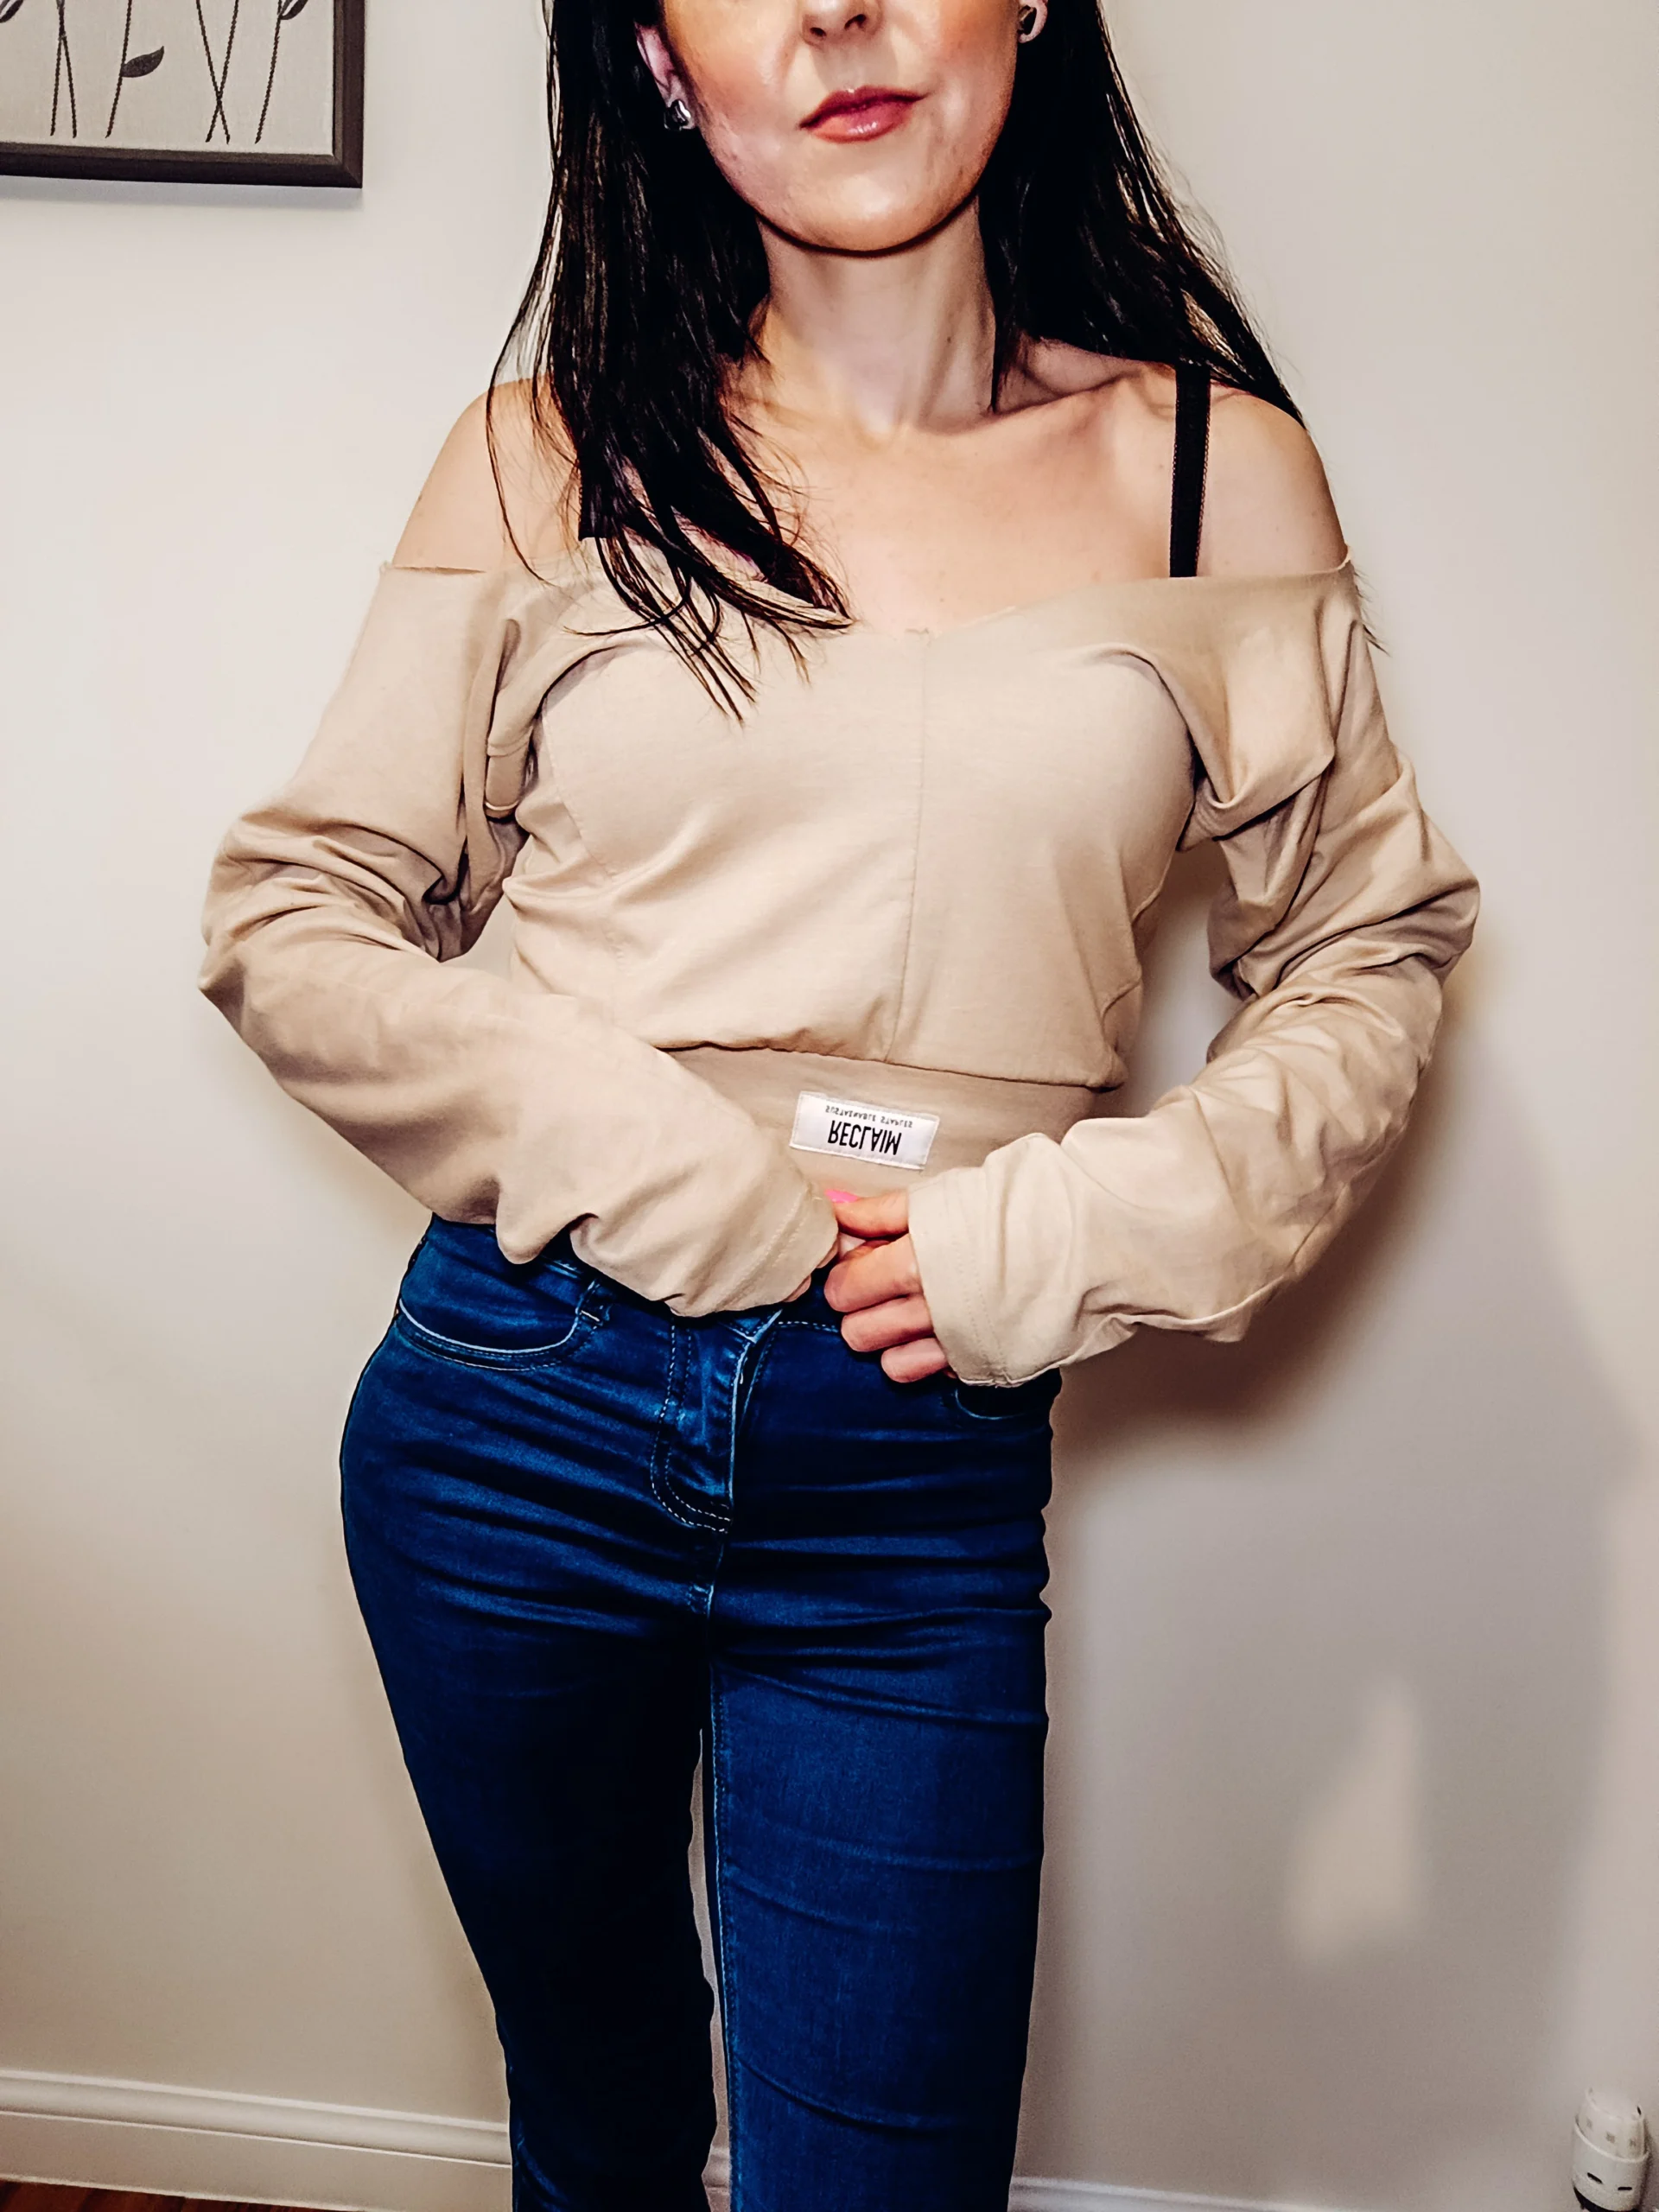
Free Lightroom Preset Tutorial: “Soft Cream Influencer Aesthetic”
This tutorial is for Adobe Lightroom Mobile but you can also use this same tutorial on the standard desktop version as well. If you’ve ever wondered how influencers achieved that soft creamy aesthetic then they’re probably using a filter similar to this one. This filter is my own that I created myself and now I am sharing it with you. It’s called “Soft Cream Influencer Aesthetic” because it has that moody, cream aesthetic that many influencers use. You can also easily apply text overlays to your images using this preset.
What You’ll Need:
For this Lightroom preset tutorial you will need just two things:
Lightroom Mobile (free version is fine)
A photo you want to edit (ideally natural light or neutral background)
Before you start editing, you will need to decide on a photo that you want to edit in Lightroom. Import it from your phone into the Lightroom Mobile app. Now click on the photo you’ve just imported and want to edit and head to the toolbar at the bottom of your screen. Here you will find a range of editing tools from brightness, contrast, saturation, detail and color adjustments. Once you’re here, follow these instructions below.
1. Color Adjustments (Color > Mix Tool)
Yellow
- Hue: Adjust slightly left toward green to neutralize yellow
- Saturation: -40 to -60 (depending on how yellow the image is)
- Luminance: Optional – slightly increase if whites still feel tinted
Orange (Skin Tone)
- Hue: Leave as is or adjust slightly toward red for warmth
- Saturation: +10 to +20 (adds richness without orange cast)
- Luminance: -30 to -50 (deepens skin tone to appear more tanned)
Blue
- Saturation: -100 (removes cool tones that can tint whites)
- Luminance: -20 to -40 (further softens any coldness)
Green
- Saturation: -60 to -100 (minimizes distracting green hues)
- Luminance: -10 to -30 (optional)
2. Light Settings
- Exposure: -0.30 to -0.60 (creates that “moody” dark look)
- Contrast: Optional based on photo; slight boost can add definition
- Highlights: -80 to -100 (adds soft, hazy feel)
- Shadows: Optional; slight increase if areas are too dark
- Whites: Slightly decrease to avoid harsh brightness
- Blacks: Optional; slightly decrease to add depth
3. Effects Panel
- Texture: +10 to +20 (adds detail)
- Clarity: Optional; +5 if needed for additional crispness
- Dehaze: 0 (not used here)
4. Detail Panel
- Sharpening: +20 to +40 (counters softness from phone or DSLR)
- Noise Reduction: Optional, depending on image quality
Create Your Own Preset in Lightroom
Once you’ve followed these instructions above, you’ll want to save this as a preset that you can simply click on and apply to your photos like a filter. Creating your own preset in Lightroom will save you from having to repeat the Lightroom presets tutorial above every time you want to edit your photos. Head to the top right hand corner, click on the menu and scroll down to “Create Preset” you can then give your preset a name and save.
Well done! You’ve just created your own preset in Lightroom!